이전글에서 구현한 Virtual DOM 그리고 Virtual DOM을 DOM에 올려주는 createElement를 토대로 spa router와 재조정 기능을 만들어보겠습니다.
spa router 구현
SPA(Single Page Application)개념에 대해 간단하게 집고 넘어가겠습니다.
SPA는 처음 페이지 요청시에만 서버에서 html파일을 받아와서 로드하고 그 이후부터는 변경사항이 일어나는 부분만 변경해서 페이지를 새로고침 없이 갱신합니다.
spa router는 아래와 같은 기능을 갖춰야 합니다.
- 현재 url에 맞는 component를 매칭시켜서 보여준다.
- 페이지 이동시 새로고침없이 이동하고 1번 동작을 실행
routes구조 설계
1번 동작을 위해서 어떤 url에 component를 매칭시킬지에 대한 정보를 담은 routes에 대한 설계를 해주겠습니다.(저는 트리구조로 구성을 했습니다.)
export const routes = [
  {
    path: "/",
    element: HomePage,
    errorElement: NotFoundPage,
    children: [
      {
        path: "blog",
        element: BlogPage,
      },
      {
        path: "post",
        children: [
          {
            path: ":id",
            element: PostPage,
          },
        ],
      },
    ],
  },
];export const routes = [
{
path: "/",
element: HomePage,
errorElement: NotFoundPage,
children: [
{
path: "blog",
element: BlogPage,
},
{
path: "post",
children: [
{
path: ":id",
element: PostPage,
},
],
},
],
},
];router 구조 잡기
이제 spa를 위한 router에 대한 구현을 하겠습니다. 기능 구현을 하기에 앞서 어떤 것들을 구현할 것인지 정의를 했습니다. history와 router 메서드는 아래 역할을 담당합니다.
- history : 컴포넌트 단에서 history.push나 back,replace등의 작업을 하기 위한 역할
- router : main페이지에서 routes 정보를 등록하고 spa를 위한 기능이나 이벤트를 부착해주는 역할
export type Route = {
  path: string;
  element?: Component;
  errorElement?: Component;
  children?: Route[];
};

const spaRouter = () => {
  const routeInfo: { root: HTMLElement | null; routes: Route[] | null } = {
    root: null,
    routes: null,
  };

  const history = () => {
  }

  const router = (root: HTMLElement, routes: Route[]) => {
    routeInfo.root = root;
    routeInfo.routes = routes;
  };
  return {history, router}
}

export const {history,router} = spaRouter();export type Route = {
path: string;
element?: Component;
errorElement?: Component;
children?: Route[];
};
const spaRouter = () => {
const routeInfo: { root: HTMLElement | null; routes: Route[] | null } = {
root: null,
routes: null,
};
const history = () => {
}
const router = (root: HTMLElement, routes: Route[]) => {
routeInfo.root = root;
routeInfo.routes = routes;
};
return {history, router}
}
export const {history,router} = spaRouter();loadRouteComponent 함수 구현
router쪽을 구현하기 전에 가장 중요한 함수인 loadRouteComponent를 먼저 구현하겠습니다.
현재 들어온 path기준으로 routes정보에서 매칭되는 path가 있는지 찾고 컴포넌트를 반환해주는 함수입니다.
매칭된 컴포넌트가 없다면 에러를 발생시켜주고 매칭된 컴포넌트가 존재한다면 routeInfo.root에 child가 존재할 경우 노드를 전부 지운 후에 routeInfo.root의 자식에 매칭된 컴포넌트인 Virtual DOM을 createElement로 DOM으로 변경후 부착을 해줍니다.
routeInfo.root에 child가 존재할 경우 노드를 전부 지우는 동작은 VDOM diff를 구현하는 부분에서 수정할 예정입니다.
그리고 만약 params가 존재한다면 pageParams변수에 정보를 저장합니다.
const loadRouteComponent = (path: string) => {
    const { Component, params } = matchUrlToRoute(routeInfo.routes ?? [], path);
    if (!Component) {
      throw new Error("no matching component error");
    } else {
      pageParams = params;
      if (routeInfo.root) {
        while (routeInfo.root.firstChild) {
          routeInfo.root.removeChild(routeInfo.root.firstChild);
        }
        routeInfo.root.appendChild(createElement(Component()));
      } else {
        throw new Error("root element is empty");
      }
    }
};const loadRouteComponent = (path: string) => {
const { Component, params } = matchUrlToRoute(routeInfo.routes ?? [], path);
if (!Component) {
throw new Error("no matching component error");
} else {
pageParams = params;
if (routeInfo.root) {
while (routeInfo.root.firstChild) {
routeInfo.root.removeChild(routeInfo.root.firstChild);
}
routeInfo.root.appendChild(createElement(Component()));
} else {
throw new Error("root element is empty");
}
}
};위의 matchUrlToRoute 함수는 routes의 정보와 현재 path 정보를 파라미터로 받습니다. (path는 /category/apple 과 같은 형태로 들어올 것입니다.)
그리고 아래 과정을 거쳐서 매칭된 component를 반환해줍니다.
export const pathToRegex = (path: string) => {
  return new RegExp("^" + path.replace(/:\w+/g, "(.+)") + "$");
};export const pathToRegex = (path: string) => {
return new RegExp("^" + path.replace(/:\w+/g, "(.+)") + "$");
};const matchUrlToRoute = (routes: Route[], path: string) => {
//1. "/category/apple" => ['/', 'category', 'apple']` 이런 형태의 segements를 얻는다.
const segments = path.split("/").map((segment) => {
if (segment === "") return "/";
return segment;
});
if (segments.length <= 2 && segments[1] === "/") {
return { Component: routes[0].element, params: undefined };
}
//2. children이 없고 segments가 하나만 남았을때까지 재귀적으로 도는 함수
function traverse(
routes: Route[],
segments: string[],
errorComponent?: Component
) {
//3. routes를 순회함
for (const route of routes) {
const { path, children, element, errorElement } = route;
//4. pathToRegex함수를통해 path를 정규식 형태로 만들어준다.
const regex = pathToRegex(path);
//5. segments의 첫 번째 index가 regex랑 매칭이 되는지 확인합니다.
const [pathname, params] = segments[0].match(regex) || [];
//6. 매칭이 된게 없으면 넘어갑니다.
if (!pathname) continue;
//7. segments의 길이가 1인 경우엔 더이상 탐색할게 없으므로 매칭된 component를 반환한다.
if (segments.length === 1) {
return { Component: element, params };
} else if (children) {
//8. children이 있을 경우 재귀적으로 traverse를 호출한다.
return traverse(
children,
segments.slice(1),
errorElement ?? errorComponent
);
}
}
//9. 매칭된게 없을 경우 errorComopnent반환
return { Component: errorComponent, params: undefined };
}
return traverse(routes, segments);
};/기준으로 split을 해주고['/', 'category', 'apple']형태의 segements를 얻어줍니다.- children이 없고 segments가 하나만 남았을때까지 재귀적으로 실행
- routes를 순회하면서 정의되어 있는 path나 children같은 값들을 얻어옵니다.
- pathToRegex라는 함수를 통해 path를 정규식으로 만들어주고 동적 라우팅을 지원하기 위해
:id형태는 그룹화 시켜줍니다. - segments의 0번째 index가 regex랑 매칭이 되는지 확인한다.
:id형태에 매칭된 값은 params에 들어갑니다. - 매칭이 된게 없으면 다음 route로 넘어갑니다.
- segments의 길이가 1인 경우엔 더 탐색을 할게 남아있지 않으므로 매칭된 컴포넌트를 반환합니다.
- children이 존재할 경우 children과 segments가 없을 때 까지 재귀적으로 traverse를 호출한다.
errorElement ?? errorComponent조건이 있는 이유는 현재 route에서 가장 가까운 errorElement를 보여주기 위함입니다. - 매칭된게 존재하지 않을 경우 errorComopnent를 반환합니다.
routes를 트리구조로 작성하고 현재 브라우저의 url에 매칭시켜서 컴포넌트를 보여주기 위해 위와 같은 로직을 작성했습니다. 만약 routes를 다른 구조로 작성하고 싶다면 routes구조에 맞게 matchUrlToRoute쪽 함수의 구현부만 변경하면 됩니다.
router 함수 구현
router 함수에서 구현해야할 기능입니다.
- router 함수를 실행 시킬때 routerInfo에 root와 routes정보를 바인딩해줍니다.
- 현재 url에 매핑되는 컴포넌트를 보여줍니다.
data-link태그가 붙은 a태그에 기본 브라우저의 동작을 막기 위한 customizeAnchorBehavior 함수를 구현해줍니다.(이벤트 위임 이용)- window에
popstate이벤트를 달아줍니다. (브라우저에서 뒤로가기나 앞으로가기를 했을 경우 현재 url에 맞는 컴포넌트를 보여주기 위함)
아직 구현하지 않은
history.currentPath함수는 바로 아래에서 구현할 예정입니다.
const router = (root: HTMLElement, routes: Route[]) => {
   routeInfo.root = root;
   routeInfo.routes = routes;

   // attach "data-link" to attribute of anchor tag when use custom anchor tag
   const customizeAnchorBehavior = () => {
     window.addEventListener("click", (e) => {
       const el = e.target as HTMLElement;
       const anchor = el.closest("a[data-link]");
       if (!(anchor instanceof HTMLAnchorElement)) return;
       if (!anchor) return;
       e.preventDefault();
       history.push(anchor.pathname + anchor.search);
     });
   };

   const initLoad = () => {
     loadRouteComponent(history.currentPath());
     customizeAnchorBehavior();

     window.addEventListener("popstate", () => {
       loadRouteComponent(history.currentPath());
     });
   };

   initLoad();
};const router = (root: HTMLElement, routes: Route[]) => {
routeInfo.root = root;
routeInfo.routes = routes;
// attach "data-link" to attribute of anchor tag when use custom anchor tag
const customizeAnchorBehavior = () => {
window.addEventListener("click", (e) => {
const el = e.target as HTMLElement;
const anchor = el.closest("a[data-link]");
if (!(anchor instanceof HTMLAnchorElement)) return;
if (!anchor) return;
e.preventDefault();
history.push(anchor.pathname + anchor.search);
});
};
const initLoad = () => {
loadRouteComponent(history.currentPath());
customizeAnchorBehavior();
window.addEventListener("popstate", () => {
loadRouteComponent(history.currentPath());
});
};
initLoad();
};history 기능 구현
history의 경우엔 브라우저 history를 조작하기 위한 함수들이 모여있는 객체입니다.
- getPageParams : loadRouteComponent함수에서 얻은 pageParms를 그대로 return해줍니다.
- replace : history replace를 위한 함수입니다.
- push : history push를 위한 함수입니다.
- back : history back을 해서 popstate를 동작시킵니다.
- currentPath : 현재의 pathname을 얻어옵니다.
const history = {
    getPageParams() {
      return pageParams;
    },
    replace(path: string) {
      const { pathname, search } = new URL(window.location.origin + path);
      window.history.replaceState({}, "", pathname + search);
      loadRouteComponent(pathname);
    },
    push(path: string) {
      const { pathname, search } = new URL(window.location.origin + path);
      window.history.pushState({}, "", pathname + search);
      loadRouteComponent(pathname);
    },
    back() {
      window.history.back();
    },
    currentPath() {
      return window.location.pathname;
    },
};const history = {
getPageParams() {
return pageParams;
},
replace(path: string) {
const { pathname, search } = new URL(window.location.origin + path);
window.history.replaceState({}, "", pathname + search);
loadRouteComponent(pathname);
},
push(path: string) {
const { pathname, search } = new URL(window.location.origin + path);
window.history.pushState({}, "", pathname + search);
loadRouteComponent(pathname);
},
back() {
window.history.back();
},
currentPath() {
return window.location.pathname;
},
};router 동작 테스트
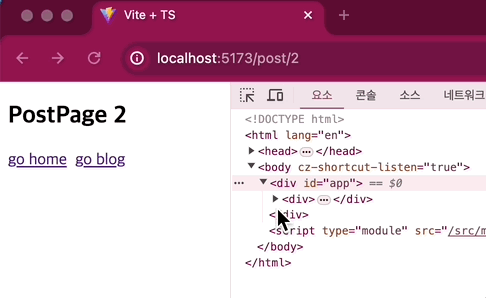
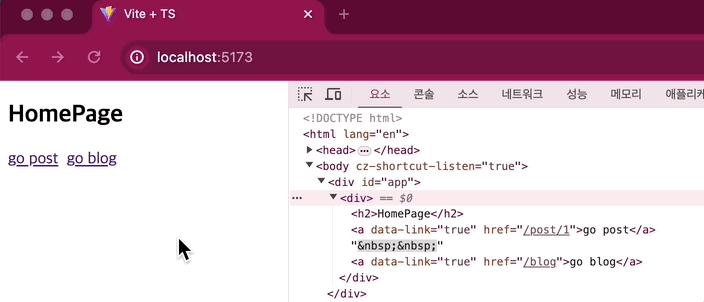
이제 각 페이지별 컴포넌트를 구현하고 동작 테스트를 해보겠습니다.
const BlogPage = () => {
return (
<div>
<h2>BlogPage</h2>
<a data-link href="/">
go home
</a>
<a data-link href="/post/2">
go post
</a>
</div>
);
};
export default BlogPage;const BlogPage = () => {
return (
<div>
<h2>BlogPage</h2>
<a data-link href="/">
go home
</a>
<a data-link href="/post/2">
go post
</a>
</div>
);
};
export default BlogPage;const HomePage = () => {
return (
<div>
<h2>HomePage</h2>
<a data-link href="/post/1">
go post
</a>
<a data-link href="/blog">
go blog
</a>
</div>
);
};
export default HomePage;const HomePage = () => {
return (
<div>
<h2>HomePage</h2>
<a data-link href="/post/1">
go post
</a>
<a data-link href="/blog">
go blog
</a>
</div>
);
};
export default HomePage;import { history } from "@/lib/router";
const PostPage = () => {
const params = history.getPageParams();
return (
<div>
<h2>PostPage {params}</h2>
<a data-link href="/">
go home
</a>
<a data-link href="/blog">
go blog
</a>
</div>
);
};
export default PostPage;
import { history } from "@/lib/router";
const PostPage = () => {
const params = history.getPageParams();
return (
<div>
<h2>PostPage {params}</h2>
<a data-link href="/">
go home
</a>
<a data-link href="/blog">
go blog
</a>
</div>
);
};
export default PostPage;
기능이 정상적으로 동작하는걸 확인할 수 있습니다.
- 현재 url에 맞는 component를 매칭시켜서 보여준다.
- 페이지 이동시 새로고침없이 이동하고 1번 동작을 실행
그런데, 위의 SPA설명에서 변경사항이 일어나는 부분만 변경해서 페이지를 갱신한다는 말이 있는데, 실제 동작을 확인해보면 페이지 변경시마다 전체 DOM을 다시 그리고 있습니다.
개선을 하려면 어떻게 해야할까요? 현재 Virtual DOM과 변경될 Virtual DOM을 비교해서 변경이 필요한 부분만 찾아서 DOM에 반영해주는 과정이 필요합니다.
재조정(Reconciliation) 기능 구현
router 뿐만 아니라 이후에 구현할
useState를 위해서 현재 Virtual DOM과 변경될 Virtual DOM을 비교후 변경이 필요한 부분만 찾아서 DOM에 반영하는 과정은 매우 중요합니다.
만약 변경점만 찾아서 DOM을 업데이트 하지 않는다면, 페이지 이동시 변경되는 요소가 많이 없는 경우에도 처음부터 다시 DOM을 다 그릴것이고, 상태가 변경되어서 숫자 하나만 바뀌어도 DOM이 전부 리렌더링이 될 것입니다.
코드는 다음과 같이 구성을 해주겠습니다.
updateElement함수의 각 파라미터에 대한 의미입니다.
- parent: 만들어진 DOM이 부착될 요소
- newVDOM: 새롭게 만들어진 Virtual DOM
- currentVDOM: 현재 Virtual DOM
- index: 탐색할 parent자식 요소의 index
import { VNode } from "../jsx/jsx-runtime/type";
import { createElement } from "./client";

const diffTextVDOM = (newVDOM: VNode, currentVDOM: VNode) => {
  if (typeof newVDOM === "number" && typeof currentVDOM === "string")
    return true;
  if (typeof newVDOM === "string" && typeof currentVDOM === "number")
    return true;
  if (typeof newVDOM === "number" && typeof currentVDOM === "number")
    return true;
  if (typeof newVDOM === "string" && typeof currentVDOM === "string") {
    return true;
  }
  if (newVDOM === currentVDOM) return false;

  return false;
};

const updateElement = (
  parent: Element,
  newVDOM?: VNode | null,
  currentVDOM?: VNode | null,
  index: number = 0
) => {
  let removeIndex: undefined | number = undefined;

  const hasOnlyCurrentVDOM =
    newVDOM === null ||
    (newVDOM === undefined &&
      currentVDOM !== null &&
      currentVDOM !== undefined);

  const hasOnlyNewVDOM =
    newVDOM !== null &&
    newVDOM !== undefined &&
    (currentVDOM === null || currentVDOM === undefined);


  //1.
  if (parent.childNodes) {
    if (hasOnlyCurrentVDOM) {
      parent.removeChild(parent.childNodes[index]);
      return index;
    }
  }

  //2.
  if (hasOnlyNewVDOM) {
    parent.appendChild(createElement(newVDOM));
    return;
  }

  //3.
  if (diffTextVDOM(newVDOM, currentVDOM)) {
    parent.replaceChild(createElement(newVDOM), parent.childNodes[index]);
    return;
  }

  if (typeof newVDOM === "number" || typeof newVDOM === "string") return;
  if (typeof currentVDOM === "number" || typeof currentVDOM === "string") return;
  if (!newVDOM || !currentVDOM) return;

  //4.
  if (newVDOM.type !== currentVDOM.type) {
    parent.replaceChild(createElement(newVDOM), parent.childNodes[index]);
    return;
  }

  //5.
  updateAttributes(
    parent.childNodes[index] as Element,
    newVDOM.props ?? {},
    currentVDOM.props ?? {}
  );

  //6.
  const maxLength = Math.max(
    newVDOM.children.length,
    currentVDOM.children.length
  );
  for (let i = 0; i < maxLength; i++) {
    const _removeIndex = updateElement(
      parent.childNodes[index] as Element,
      newVDOM.children[i],
      currentVDOM.children[i],
      removeIndex ?? i
    );
    removeIndex = _removeIndex;
  }
};

function updateAttributes(
  target: Element,
  newProps: Record<string, any>,
  oldProps: Record<string, any>
) {
  for (const [attr, value] of Object.entries(newProps)) {
    if (oldProps[attr] === newProps[attr]) continue;
    (target as any)[attr] = value;
  }

  for (const attr of Object.keys(oldProps)) {
    if (newProps[attr] !== undefined) continue;
    if (attr.startsWith("on")) {
      (target as any)[attr] = null;
    } else if (attr.startsWith("class")) {
      target.removeAttribute("class");
    } else {
      target.removeAttribute(attr);
    }
  }
}

export { updateElement };
위 코드의 각 번호에 대한 설명입니다.
- childNodes가 존재하고, currentVDOM만 존재하는 경우 currentVDOM에 대한 node를 DOM에서 제거합니다. (변경될 요소가 currentVDOM보다 적다는 뜻이므로 DOM에서 제거를 해야함)
- newVDOM만 존재하는 경우 newVDOM을 createElement를 통해 DOM으로 변경 후 parent에 추가를 해줍니다.
- diffTextVDOM을 통해 newVDOM이나 currentVDOM이 단순히 텍스트 노드로 변환될 Virtual DOM인지를 비교해서 currentVDOM을 newVDOM으로 변경해줍니다.
- newVDOM과 currentVDOM의 tag type이 다를 경우에도 newVDOM으로 변경을 해줍니다.
- newVDOM과 currentVDOM의 props를 비교하여 변경된 부분만 반영해줍니다.
updateAttributes는 변경될 newProps를 순회하면서 oldProps와 다른 부분이 있을 경우 oldProps를 newProps로 변경해줍니다.
그리고 oldProps를 순회하면서 지워져야할 props를 판단해서 지워줍니다. (지워져야할 이벤트와 class를 위한 분기문이 존재합니다. 그 외의 속성은 그냥 removeAttribute로 제거를 해줬습니다.) - newVDOM과 currentVDOM에 존재하는 자식들도 비교후 DOM에 올리기 위해 updateElement를 재귀적으로 호출을 해줍니다.
updateElement에서 removeIndex를 받아오는 이유는[1,2,3,4,5]라는 배열이 존재한다고 했을 때2,3,4를 없애기 위해서splice(1,1); splice(2,1); splice(3,1)을 해주는 행위를 막기 위해서 필요합니다.
지워진 index가 있다면 해당 index를 반환해서 다음 updateElement의 index로 활용을 해야 정상적으로 removeChild로직이 동작을 하게 됩니다.
render함수 구현
이제 Virtual DOM이 추가될 root요소와 component를 파라미터로 받아서 실행시키고 현재의 Virtual DOM을 저장하는 기능을 구현해야 합니다.
그래야 새로운 Virtual DOM과 현재 Virtual DOM을 비교해서 DOM에 업데이트가 가능해집니다.
render함수는 root엘리먼트와 component를 renderInfo에 저장을 해두고 _render함수를 실행시킵니다.
_render함수는 렌더링할 컴포넌트를 실행시켜서 Virtual DOM을 얻어오고 위에서 구현한 updateElement를 통해 currentVDOM과 newVDOM을 비교후 DOM에 렌더링을 합니다.
import { VDOM } from "../jsx/jsx-runtime/type";
import { updateElement } from "./diff";
// src/lib/dom/types
// export type Component = (props?: Record<string, any>) => any;
import type { Component } from "./types";

interface IRenderInfo {
  $root: HTMLElement | null;
  component: null | Component;
  currentVDOM: VDOM | null;
}

const domRenderer = () => {
  const renderInfo: IRenderInfo = {
    $root: null,
    component: null,
    currentVDOM: null,
  };

  const _render = () => {
    const { $root, currentVDOM, component } = renderInfo;
    if (!$root || !component) return;

    const newVDOM = component();
    updateElement($root, newVDOM, currentVDOM);
    renderInfo.currentVDOM = newVDOM;
  };

  const render = (root: HTMLElement, component: Component) => {
    renderInfo.$root = root;
    renderInfo.component = component;
    _render();
  };

  return { render };
};

export const { render } = domRenderer();
loadRouteComponent 로직 변경
loadRouteComponent에서 자식 요소를 전부 지우고 DOM을 새롭게 올리던 로직을 삭제해주고 render함수를 이용해줍니다.
이제
loadRouteComponent함수가 실행이 될 때마다 바뀌게 될 VDOM과 현재 VDOM을 비교해서 변경된 부분만 DOM에 렌더링이 될 것입니다.
const loadRouteComponent = (path: string) => {
    const { Component, params } = matchUrlToRoute(routeInfo.routes ?? [], path);
    if (!Component) {
      throw new Error("no matching component error");
    } else {
      pageParams = params;
      if (routeInfo.root) {
        render(routeInfo.root, Component);
      } else {
        throw new Error("root element is empty");
      }
    }
};const loadRouteComponent = (path: string) => {
const { Component, params } = matchUrlToRoute(routeInfo.routes ?? [], path);
if (!Component) {
throw new Error("no matching component error");
} else {
pageParams = params;
if (routeInfo.root) {
render(routeInfo.root, Component);
} else {
throw new Error("root element is empty");
}
}
};동작확인
페이지가 변경될때마다 변경된 부분만 교체하는걸 확인할 수 있습니다.
마치며
spa동작을 위한 기능들을 모두 구현해봤습니다.
다음 글에서는 리액트의 useState,useEffect훅을 구현해서 좀더 완성도를 높여보겠습니다.
